
It’s no secret that we love ice cream. But when you need all the different flavors to keep your taste buds happy, but have limited freezer space to store all those tubs, what’s a gal to do?
Well, we’ve found a solution - homemade, no-churn ice cream.
That’s right – no ice cream maker or complicated recipe required. This DIY version is super simple - the base recipe calls for only five ingredients and can be customized to satisfy any craving. We like to divide the base into two (or even three) and add different flavorings to each. We get all the flavors, with freezer room to spare. Perfect!
We like to think of it as a choose your own adventure experience. Start with our secret ingredient vanilla base, and add your favorite flavorings and mix-ins for your own custom treat. Our DIY no-churn guide will lead you on your next delicious ice cream adventure.
Secret Ingredient Vanilla No-Churn Ice Cream (aka the base)
- 2 cups heavy whipping cream
- 1 (14oz) can sweetened condensed milk (not evaporated milk)
- 1-2 tsp vanilla extract
- ½ cup marshmallow crème or fluff (our secret ingredient 🤫 - optional, but see note below)
- Pinch of salt (optional)
- Mix the sweetened condensed milk, vanilla extract, and salt (if using).
- Stir in marshmallow crème and mix until minimal lumps remain.
- Using a stand mixer fitted with the whisk attachment or an electric hand beater, beat the cream until it forms stiff peaks. The cream will hold its shape when the beater is lifted (and looked like whipped cream). Don’t overbeat it or you’ll end up with butter (we're not going for the chunky look here).
- Gently fold half of the whipped cream into the condensed milk mixture. Once combined, fold in the rest of the whipped cream.
- Transfer the mixture to a shallow, plastic container with a tight-fitting lid. A metal (not glass) loaf pan will work in a pinch.
- Place a piece of parchment paper or plastic wrap directly on the surface of the ice cream to prevent any ice crystal formation.
- Cover with the lid (or more plastic wrap) and freeze for at least 4-6 hours before using. (Find the best way to store your ice cream here).

Notes:
◦ For best results, chill the milk mixture in the fridge for 20-30 minutes before using. This will help keep your cream cold so it freezes faster, giving the ice cream a smoother, creamier texture (and further increasing the yumminess).
◦ Marshmallows don't freeze, so the crème keeps your ice cream scoopable without adding much marshmallow taste. Without it, the ice cream will be pretty firm. If so, let your container sit out for a few minutes to soften before scooping.
Both marshmallow crème and fluff will both work and precise measurements aren’t needed for this sticky sweet (there’s really no such thing as too much marshmallow).
Here are our tips for measuring marshmallow crème and fluff:
For Jet-Puffed Marshmallow Crème: One 7 oz jar contains about 2 cups of crème, If you have a kitchen scale, the easiest way to measure it is by weight. A half cup weighs about 2 oz, otherwise use about ¼ of a 7oz jar or 2 really big spoonfuls.
For Marshmallow Fluff: A 7 1/2 oz jar contains about 2 1/2 cups. By weight, a half cup is a generous 1.5 oz. No scale? Try a ¼ jar or 2 big spoonfuls.
Hot Tip: For either product, dipping your spoon in hot water before scooping can make things a bit less sticky and easier to work with.
It’s all about the base
Want a different base flavor? There are soooo many choices. Use the no-churn vanilla recipe and add a flavoring (ideas below) to the sweetened condensed milk mixture before adding the whipped cream to switch things up. If you’re dividing your recipe to make more than one flavor, don’t forget to adjust the amount of the flavoring ingredients too.
- Blue Moon – add 1 tsp almond extract, ½ tsp raspberry extract, ½ tsp lemon extract, blue food coloring
- Cake batter – ⅔ cup yellow or funfetti cake mix (dry) and 2 tbsp melted butter
- Caramel – use a 14oz can of Dulce de leche instead of the sweetened condensed milk (add ½ tsp flaky sea salt for salted caramel)
- Chocolate – add ½ cup cocoa powder OR 6 oz of dark or semi-sweet chocolate, melted and cooled
- Chocolate Hazelnut (aka Nutella) – add ½ cup of chocolate hazelnut spread
- Cinnamon Bun – add ½ tsp cinnamon and 3 tablespoons melted butter
- Coffee – dissolve 2 tbsp instant expresso granules in 2 tbps hot water then stir into condensed milk mixture
- Cookie Monster – mix blue food coloring into the condensed milk mix, then gently fold in about ½ cup crushed Oreos (about 8 regular cookies) and ½ cup crushed chocolate chip cookies after mixing the whipped cream with the condensed milk, right before transferring to the container for freezing
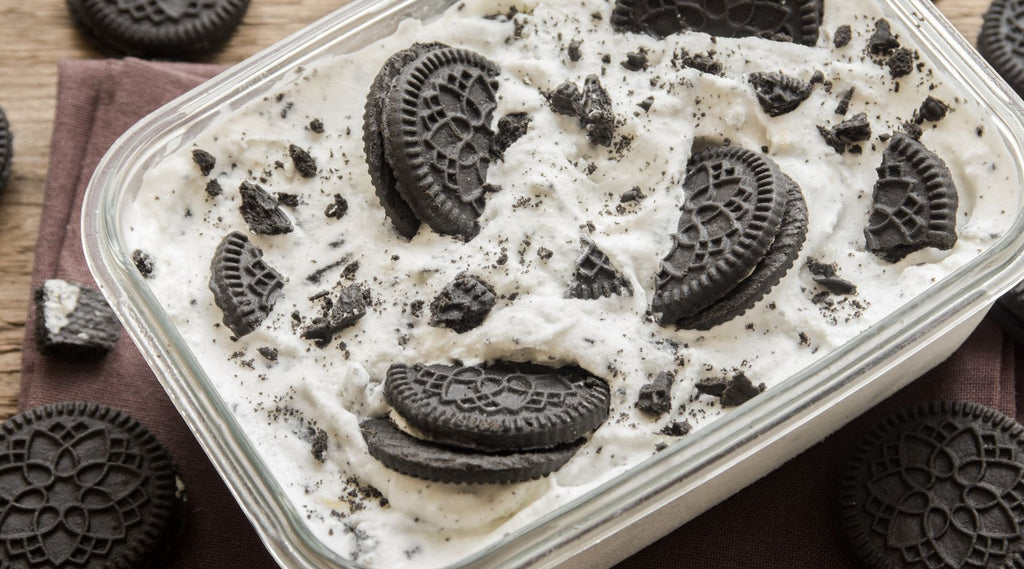
- Cookies ‘n Crème – gently fold in about 1 cup crushed Oreos (about 15 regular cookies) after mixing the whipped cream with the condensed milk, right before transferring to the container for freezing
- Lemon – add 1 tbsp lemon extract (or 2 tbsp lemon zest) and ¼ cup lemon juice, yellow food coloring if desired
- Lime – add 1.5 tbsp lime zest and ⅓ cup lime juice, green food coloring if desired
- Mermaid – Divide the completed recipe into 3 bowls and gently stir a different food color into each one (we like pink, purple and blue). Drop by spoonfuls into the container, alternating colors for a mermaid effect.
- Mint – add ½ to 1 tsp of mint or peppermint extract and green food coloring (if desired)
- Peanut butter – add ½ cup of peanut butter (creamy, crunchy, natural – they all work)
- Pumpkin – add ⅔ cup pumpkin puree (not pie filling), ¾ tsp ground cinnamon, ½ tsp ground ginger, ¼ tsp nutmeg, ⅛ tsp ground cloves (or 2 tsp pumpkin pie spice instead of the spices)
- Toasted Marshmallow – add 12 toasted regular size marshmallows (along with the ½ cup of marshmallow fluff called for in the base recipe)

Mix-in it up
A little texture takes your treats to the next level. We’ve rounded up some of our favorite add-ins for a decadent dessert.
Add the mix-ins when adding the ice cream to the container just before freezing (unless otherwise specified). Layer them in gently, starting with a layer of ice cream followed by a layer of mix-ins. Repeat as many times as needed ending with the mix-ins. Crush, cut or crumble any bigger pieces for an even distribution (and the perfect amount of 'stuff' in every bite).
Candy Cravings
- M&Ms (regular or mini, whole or crushed)
- Chopped candy bars
- Reese’s pieces or peanut butter cups
- Toffee bits
- Gummy bears
- Chocolate chips or chunks (or any other chocolate)
Baked Bites
- Cookies (Oreo, chocolate chip, oatmeal, double chocolate - you really can’t go wrong here) – about 1 cup of chopped cookies should give a good cookie to ice cream ratio.
- Cookie dough pieces – homemade or store bought (use an eggless one that’s safe to eat raw)
- Brownies
- Cake
- Pie crust
- Graham crackers
- Waffle cones
- Pretzels (or chocolate covered pretzels)
- Granola
- Pop-tarts®
Fruit Favs
- Raisins
- Dried cranberries
- Fresh strawberries or blueberries
- Banana
- Pie filling (cherry, pumpkin, blueberry, etc)
- Jam (don’t chill this one, just give it a good stir and dollop it in)
- Any fruit purée
Other Tasty Treats
- Nuts
- Cereal
- Sprinkles
- Shredded coconut (toasted is the best)
- Mini marshmallows
- Marshmallow fluff
- Toasted marshmallows (add these to the condensed milk mix not at the end)
- Chocolate Ganache (once the ice cream and ganache are all layered, gently drag a knife through it to swirl the ganache into the ice cream)
- Peanut butter (swirl it in like the ganache)

After all those tough decisions picking the perfect combo of flavors and mix-ins, and your no-churn ice cream is frozen ready to eat, sit back, relax and enjoy it to the fullest. We highly recommend scooping up your creation into a Calicle insulated bowl. Designed to ensure you get to enjoy every indulgent bite by slowing melting, these bowls will transform your ice cream experience from ordinary to extraordinary (btw, why does ice cream melt?). Calicle bowls give you the opportunity to savor every last spoonful of your tasty treat without a meltdown.